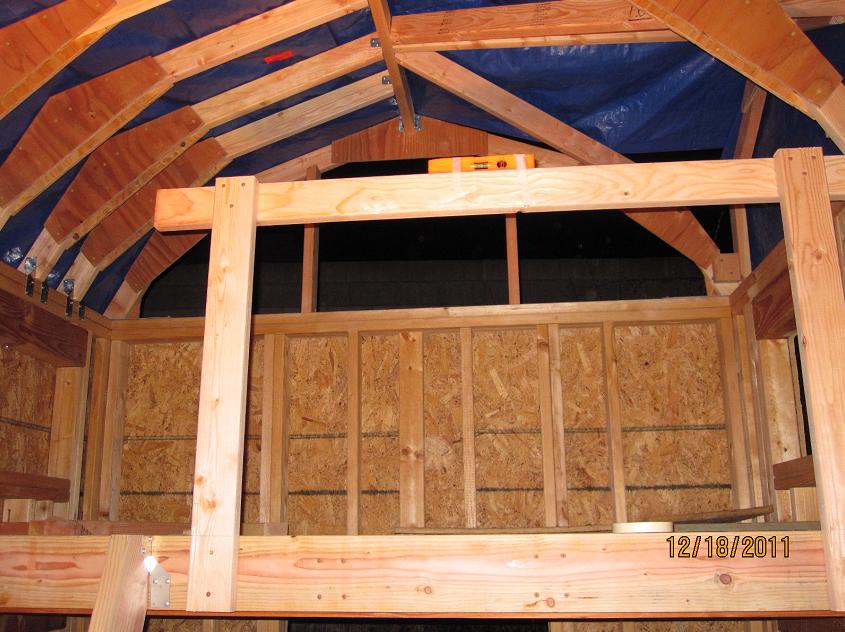
Today I went to work in the afternoon, so I had just enough time to work on building a railing for the ladder. I got a lot done, and I'm pretty pleased with how much I did in two and half hours. As the pictures show, I built the main part of the ladder railing. (I took the pictures tonight, but I built it this morning.) I just have to add a top plate for people to hold as they use the ladder. As an added "bonus" the ladder railing helps stabilize the loft railing a lot, because I made the top of the ladder railing contact the loft railing.
Tuesday, December 20, 2011
Monday, December 19, 2011
Playhouse Railing
Today after work and going to Home Depot, I only had a little time left to added another vertical 2x4 to the middle of the railing and lots of lag screws along the bottom. The railing is a lot stiffer, but still a little shaky. I want to add a railing to the ladder as well.
Sunday, December 18, 2011
Playhouse Ladder and Railing
Today I finished the ladder to get up to the loft and started the railing. The stairs took me longer than it should have because I messed up on the spacing of the steps. I didn't realize the problem until I had two steps left to install! The basic frame for the railing is up, but it's still shaky, and I need more lag screws to secure it to the loft.
Saturday, December 17, 2011
Playhouse Loft II
Today, I had to remove the spacer blocks, trim them about a quarter of an inch so they would not stick out past the bottom edge of the 2x6, and re-install the spacer blocks. Then I installed the 2x6 over the spacer blocks. I was hoping to put stairs in the playhouse to give Russell a chance to practice walking up and down stairs, but there is just not enough room to put stairs in without taking up a lot of space. So I started to build a "ship ladder," which is basically a ladder with a slight incline that is often used on ships.
Friday, December 16, 2011
Playhouse Loft
After work today, I finally found some time to work on making the loft level safe for kids to play on before I completely finish the playhouse. Right now the front edge of the loft level has plywood hanging over the joist by an inch. So I had just enough time to install the 2x4 spacer blocks underneath the protruding plywood edge picture below. Then I will cover the front end of the loft with a 2x6, to give me a large flat surface for mounting the railing and stairs.
Saturday, December 10, 2011
Playhouse Valley Rafters
I only have two new pieces of wood installed on the playhouse to show for many hours of work. These two pieces are by far the most complicated pieces of wood I had to cut because they require compound angle cuts. Between my CAD program and the trig functions on my iPod calculator app, I was hoping to figure out the exact angles I needed to cut. But it didn't workout that way partly because I changed the dormer framing design on-the-fly and partly because there is a difference between designing a playhouse in the virtual CAD world and building a playhouse in the real world. I ended up cutting test pieces of wood to find the approximate angles I needed by trial and error. So some ends of the valley rafters assemble with gaps and don't fit perfectly, but that's okay.
Subscribe to:
Posts (Atom)