Monday, April 4, 2011
Playhouse in CAD III
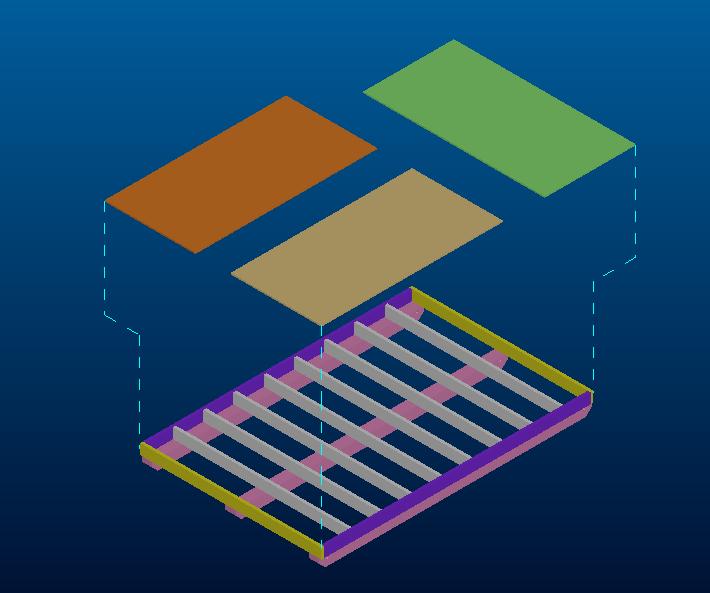
Moving on to the details of the playhouse. Here's an assembly view and exploded view for the floor framing and floor panels. The different colors are just for visual clarity ... unless Renee volunteers to paint the pieces herself!
Sunday, April 3, 2011
Playhouse in CAD II
I worked on the playhouse design some more today, and I have the main design figured out. Even though I want adults to be able to fit inside now (and I have man-cave plans in the future), I want to keep the proportions of the house kid-sized, so the main entrance on the south side will be only 5 feet tall. Then grown ups can enter through the French doors on the west side. I might be getting too ambitions with the L-shaped "second floor loft.." I may have to add some support posts under the loft, or I may have to scale it back to a simple rectangle. But for now this is my plan.
Saturday, April 2, 2011
Playhouse in CAD
I started to work on the playhouse in CAD for the first time since our old computer crashed. I was expecting to do it on the new computer, but of course it doesn't work! It's a 32 bit program vs a 64 bit OS thing. Thank God our old laptop is is still running Windows Vista 32 bit, so I can run my CAD program and get to work! Here are screenshots of the general design. Once I figure out where the windows and doors go and the size of things, I will get into the details for how all the framing comes together. I obviously have some interference issues with some the little awning over the door and the ladder inside. Things are still evolving...
Here's what it looks like inside:
Saturday, March 26, 2011
Another Playhouse Concept
I'm thinking of changing the orientation of the playhouse in our back yard to make better use of the limited space. Renée always wishes we lived in a 2 story house. So I would like to build a quasi-second level loft for the kids to play with. That's why I sketched 2 windows stacked next to the front door.
Saturday, February 26, 2011
Playhouse on the cheap
I really want to get started on building the playhouse before I loose my motivation. But I have to get taxes out of the way, and it's still kind of rainy season weather where I live. So until I can get started, here is another quick and dirty sketch. In the interest of saving money, I am thinking of making a smaller playhouse to avoid having to pay more than $100 for a building permit. If my structure is less than 96" tall, then I don't need a permit, but that would mean the door(s) would have to be pretty short for grown ups, probably about 65" tall. I'll probably bite the bullet, pay the permit fee, and build a structure to fit a normal size door on the back.
Saturday, February 19, 2011
Playhouse Concept Sketch à la Sharpie (for Thursday 2/17/11)
Our main computer crashed around an hour after I posted Wednesday's sketch, so I don't have access to Sketchbook Pro right now and I just set up our laptop to work with the scanner last night. It will be a while before I can further develop the Victorias's Secret sketch.
Didn't have much time to sketch on Thursday or Friday, so I resorted to a new genre: the Sharpie sketch! This is another design I have for the playhouse, which I sketched with a Sharpie. Yes, it's slim on details and in a sense it's a lazy way to do a sketch for the day. But I think it's also a good exercise, because every sketch stroke counts. Every stroke must be deliberate and executed pretty much correctly, unlike pencil or pen where you can erase or sketch lightly and darken later. So it's a good sketching challenge.
As for this playhouse design, the noteworthy detail is that I moved the kid's door to the south side of the playhouse instead of the west side. I think this will work better with the layout of our backyard, so the playhouse entrance will look out to the open space of the backyard instead of the back of our house.
Subscribe to:
Posts (Atom)